Showing posts with label preserves. Show all posts

Sunday, August 10

Piccalilli


This came about through a combination of factors. My friend Rowan, who lives in the Kent countryside and has a very productive allotment, sent me home from a visit with tons of green beans and runner beans (not to mention a whole load of other stuff!). A few days earlier I'd been very disappointed with the bar snacks in the local pub, not just the flabby pork pies but also the gloopy piccalilli that was dolloped on a plate to accompany it.


I was reminded that I'd been meaning to try my hand at piccalilli for ages, especially since another allotment-owning friend had given me a jar of fabulous runner bean piccalilli a few years back. So I assembled a heap of beans, a carrot, half a red pepper and a patty pan courgette, which were washed and chopped up before being salted and left to brine overnight in the fridge.


I had two recipes - one suggested cooking the veg but I stuck to the dry brining process, which is recommended in the Pat Corbin 'Preserves' book from River Cottage, which is generally my preserving handbook.

Put the chopped veg into a large bowl, add the salt and mix well, then leave in a cool place for 24 hours (ish).


The next day you rinse the veg in ice cold water to remove the salt, then leave them to drain.

Put most of the cider vinegar in a pan with the honey and sugar, bring to the boil stirring till the sugar dissolves.


Use a bit of the cold vinegar to mix a paste with the spices, mustard and cornflour, then add a little bit of the hot vinegar into the paste and stir well before tipping it all into the pan and bringing to the boil. Don't forget to stir constantly to prevent it going lumpy or burning.

Cook for a few minutes then stir the veg in, decant into sterilised jars and put the lid on. Leave for at least two weeks, six if possible, before you eat it.


1kg veg (beans, carrots, cauliflower, peppers, courgettes, etc) chopped into small bitesize pieces.
50g salt for brining
600ml cider vinegar
150g sugar
50g honey
30g cornflour
1tsp turmeric
15g mustard powder
1.5tsp coriander seeds
1.5tsp mustard seeds
1tsp cumin seeds

Wednesday, November 27

Homemade mincemeat

You are probably wondering why the hell anyone would bother to make their own mincemeat when you can buy 'perfectly good' stuff in the shops.

To be honest I don't always make the effort since I don't eat a lot of mincemeat at christmas, but I did some last year and the mince pies went down so well that I decided to do it again this year.

Here's why I make my own mincemeat:

1. no candied peel. One of the few foody things I dislike is mass produced candied peel - the homemade stuff is fine, as my chocolate-covered orange peel fave sweetie attests.

2. vegetarian. Not a huge concern for me, and I believe a lot of shop-bought mincemeats are veggie now in any case, long gone are the days when beef suet was a staple ingredient, but it's good to know what's in there in any case, for those friends who are veggie. It's almost vegan, and if I were able to dig out some vegan trifle sponges or did an appropriate substitution it would be suitable.

3. no booze. You know I think booze in food is a waste and it dismays me that a lot of the better quality mincemeats are soaked in stuff that should really be served in a glass.


Making the mincemeat was also was the main foody tradition in our house at christmas, since we didn't really do christmas pudding and the christmas cake was only of modest proportions. 

So here's the family recipe, it's far from traditional but makes a very fine product and is very easy. This recipe makes half a dozen jars and if you use veggie suet rather than butter, it will keep for months. Adapt with booze or mixed fruit if you really must. 

11b cooking apples
1.5 lb sugar
1lb sultanas
1lb raisins
0.5 lb veggie suet
1 box trifle sponges
1 lemon
1tsp ground mixed spice
1tsp ground nutmeg

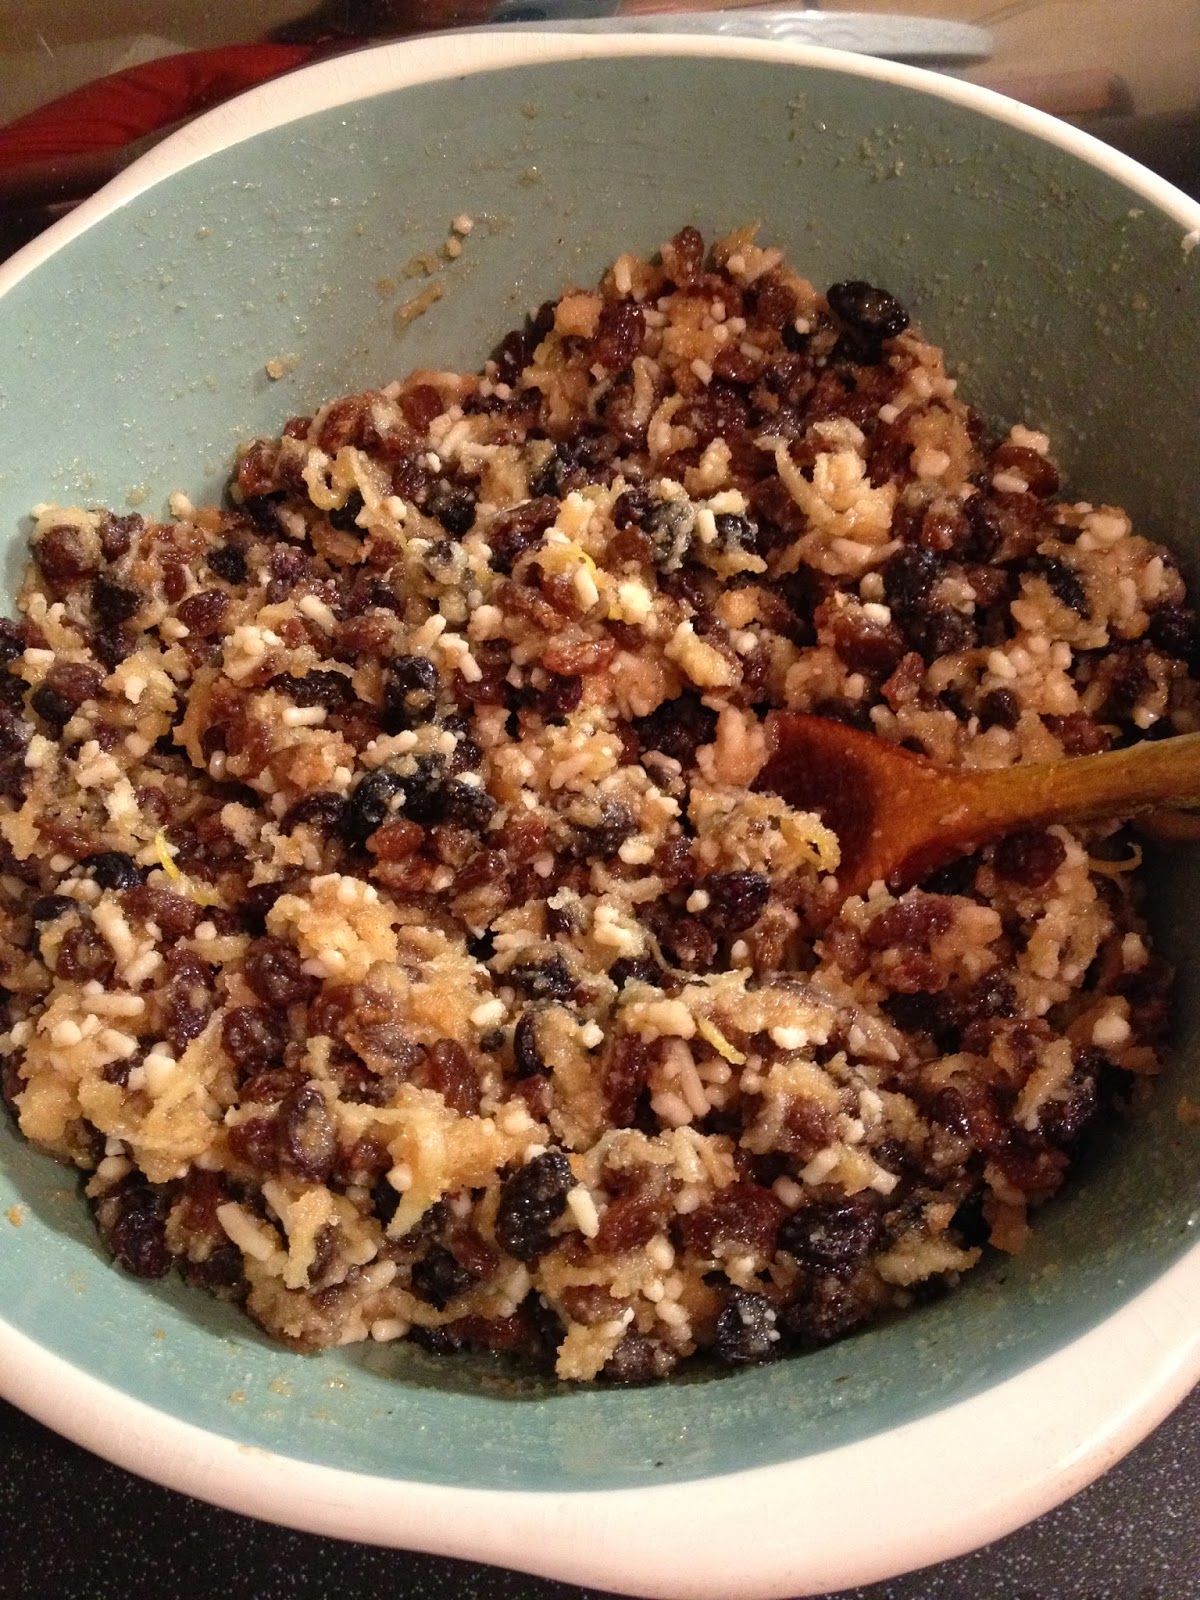
Peel and core the apples, grate them into a large bowl.
Grate the lemon peel into the apples, then juice the lemon and add that as well. 
Stir in the sultanas and raisins, then the spices, sugar and suet.
Crumble the trifle sponges into the mix, stir it well, cover with a clean teatowel and leave overnight at room temperature.

Stir again, then pack into sterilised jars and store in a cool, dark place. 

Saturday, January 12

Chipotle jam

Last year when I was on my cycling holiday in the north of England, I came across a stall hosted by the Chilli Jam Man at Malton Food Fair. I snapped up a jar of his Smoky smoked garlic and chipotle jam and would probably have bought a few more except I didn't have a lot of room in my panniers.


It turned out to be a fantastic purchase - really smoky with lots of intense flavours from the chipotles, smoked garlic and tomato,  not to mention other tantalising tastes which were alluded to on the list of ingredients.

Ever since then I've been meaning to try my own version, but chipotles are not so easy to get hold of. Except in south east London it seems - you can buy them at Borough Market from the Cool Chile Company, and online too. I see that the Chilli Jam Man sells them online too, but his are quite a bit pricier.

Having bought a packet of chipotles and a few bulbs of smoked garlic at the market, I made my first batch today. I notice from the chipotle packaging they recommend you remove the seeds before you use them, so I suspect these jars might be rather piquant...depending on your tolerance for chillies, you might want to do as suggested.

If you want to make some that's suitable for vegetarians/vegans, leave out the fish sauce.

These quantities make about three or four medium-sized jam jars.

1.3kg tomatoes
600g sugar
two chipotles
a bulb of smoked garlic
thumb-sized piece of ginger
balsamic vinegar
fish sauce
oil for roasting

Halve the tomatoes, cut out the woody stems and place them all in a large roasting tray. Put half the smoked garlic cloves in (unpeeled) then drizzle a bit of oil and a tablespoon or two of balsamic vinegar over them.


Roast in the oven at a low to medium heat (gas 4) for about 90 minutes, until the tomatoes are falling apart. You can turn them over after an hour if you wish.

Scrape the tomatoes and juices out in a large pan, squeeze the middle out of the roast garlic and add to the pan. Use a stick blender to roughly blend the mix (gets rid of the tomato skin).

Peel and crush the remaining smoked garlic cloves and add to the pan, along with the root ginger (peeled and grated) and the chipotles (lightly toasted then chopped small with seeds removed if you prefer - according to packet instructions).


Add a teaspoon of fish sauce, and a tablespoon of balsamic vinegar, then gently heat the pan till the mix is boiling. You can adjust these quantities to your own taste, but I suggest you wait till after adding the sugar to do so.

Add the sugar, stir well until it's dissolved.

Bring to a rolling boil and cook without stirring until it reaches setting point (or you get bored!). To check for setting point, put a saucer in the freezer till it's cold. Bring it out and drop a small amount of the jam onto the saucer - if it's ready you will see a skin forming. If not, continue to boil the jam.

I don't normally make my jam solid, just enough so that it doesn't run off the sausage sandwich :-)

Pour into sterilised jars (washed in hot water then put in a very low oven for five minutes - lids too) and put the lids on while the jam is still hot.

Chilli jams don't really need to mature like chutneys do, so you can eat immediately - just keep a nice glass of cool milk or lassi to hand!

I may have to rename this 'Bastard Hot Chipotle Jam'.

Saturday, August 11

Preserved lemons


I know that I promised this recipe a long time ago when I published the recipe for preserved lemon, mango and coriander chutney, but I've only just got round to doing the pictures and finding a little time to post it. It's extremely easy to make preserved lemons, and if you have a local market nearby, incredibly cheap too. Here in Deptford we can often buy six or eight lemons for £1 and so you can make a jar of these for little over a quid. They are very versatile for adding to salads, stews and so on, although so far I've only used them for chutney making.

1kg small lemons
150g good quality sea salt (I just use table salt)
1tsp black or pink peppercorns
a few bay leaves
1 tsp coriander seeds


Ideally you should use unwaxed lemons, but I would have to make a special trip to Sainsbury's or something, with no guarantee of success, so I just buy waxed ones and give them a thorough scrub with a vegetable brush first.  Set aside three or four which will be juiced.

Make two deep slits lengthways through the rest of the lemons but don't cut them right through, so that the lemon stays intact. The first time I did this I left both ends attached but found it difficult to get the salt in, so the second time I just left one end intact, it was much easier.


Rub a good teaspoonful of salt into the inside of each lemon, and pack them as tightly as you can into a large pickle jar (use the ones with the screwtop lids not the ones with the swing lids as I did in the picture below - the salt will rust the metal attachment.)


As you pack them in, sprinkle the peppercorns, coriander seeds and bay leaves between the lemons along with the rest of the salt. Juice the remaining lemons and pour the lemon juice into the jars, topping up with water so that the lemons are fully covered. It will take about four weeks for the skins to go soft and for them to be ready to eat. Usually it's only the skins that are used; wash the brine off the lemon, scrape out the flesh and then chop the skins into small pieces or whatever the recipe calls for. A beautiful, intense lemon flavour!


One thing I've found is that I have had trouble keeping the top lemon fully immersed in the brine - they tend to float up to the top of the jar. If anyone has any tips for how to prevent this, please share in the comments!

Saturday, April 7

Mango, preserved lemon and coriander chutney

A couple of months ago during a winter walk by the Thames in south west London, I visited the farmers market next to Richmond Bridge. One of the stallholders was selling some very interesting chutneys which had North African influences.

My favourite contained a lot of fresh coriander and preserved lemons. Foolishly I did not buy a jar - the logic being that I would have to carry it all day - but since that day, the taste has haunted me and I always knew I would try and replicate it.

Despite trawling the internet I failed to find a recipe for anything similar, so have made my own up. Initial tasting suggests it's a good one; the preserved lemons make it saltier than I would like, but I'm quite sensitive to salt levels and I still like it.

I made the preserved lemons a couple of months ago too, following the recipe in Pam Corbin's preserves book. Very easy to do and the lemons are great to add to stews or chop up into salads.

There were plenty of cheap mangos around in Deptford this morning, so I decided to pair them with the lemons, to add some sweetness and texture.

Today's recipe used up the rest of the preserved lemons, so it will probably be time to do some more in the next couple of weeks. I'll try and remember to share it with you when I do.


Mango, preserved lemon and coriander chutney

half a tsp ground allspice plus 5 whole ones
8 cardamom pods, seeds removed and crushed in a pestle & mortar
2 dried chillies, crushed
1tsp coriander seeds
1 onion, chopped into small pieces
2 large mangos, 3 small ('sweet') mangos
6 preserved lemons
a thumb of root ginger
125ml cider vinegar
100g sugar
large bunch of fresh coriander


Put the spices, chopped onion, mango (flesh removed and chopped), preserved lemon (discard the flesh and chop the skin into small pieces) and vinegar into a large pan and cook for about 20 mins over a low heat until onion is soft. Add the sugar and the coriander and cook for another ten minutes or so until the chutney has thickened.


Put into sterilised jars, label and leave for a few weeks to mature.

Saturday, February 11

For the love of pickles

I love preserves - whether pickled herring, home-made chutney or preserved lemons.

As well as jumping at any excuse to serve pickles and chutneys, I am always on the lookout for new recipes and love to try them wherever I see them on sale, in case I can get an idea or pick up some hints for something new. The basic recipe for my favourite ever home-made chutney (spicy apple) came from a jar I bought from a WI sale in Tenterden.


This little collection formed a large proportion of my dinner last weekend, and very tasty it was too, accompanied by bread, cheese and a hefty glass of wine.

Clockwise rom top left: smoked salmon rolls in dill sauce (part of a christmas hamper); pickled herring (last of a jar I bought more than a year ago in Ikea - lasts pretty well!); pickled garlic (my own recipe) with onion marmalade (from Paxton & Whitfield, part of another christmas hamper); pickled courgettes (my own recipe).

Plenty of plans for new pickles and preserves this year; currently waiting for the big jar of preserved lemons to mature, so I can try and work up a new chutney or relish which involves them. Tried a delicious preserved lemon and coriander sauce today at the Richmond farmers market, so I'm keen to try and replicate it. Watch this space!

Friday, August 26

Pickled courgettes II

A couple of years ago I posted about pickled courgettes, linking to the recipe on the Riverford website that I had adapted.

Since then, it has gone off the website and left no trace.

Luckily I wrote it down in my cookbook and it's been in use today for pickling the lovely yellow courgettes given to me by knitting friend Jenny, which I stupidly forgot to photograph before slicing them up...!

Pickled courgettes

500g courgettes
2tbsp salt
1 small onion
chilled tap water (I usually put a bottle in the fridge the day before)

500ml cider vinegar
120g sugar
1.5tsp mustard powder
1.5tsp crushed mustard seeds
1tsp turmeric

Slice the courgettes as thinly as possible, using a mandoline or cheese slicer if you have one, and slice the onion into thin rings. Put them in a large bowl, sprinkle over the salt and cover with chilled water.


Leave for an hour, then drain, rinse and dry thoroughly on a clean teatowel in batches.


Put all the spices, sugar and vinegar in a saucepan, heat and simmer for three minutes, then leave to cool.


Pack the courgette and onions into a large sterilised pickling jar, then pour the warm pickling mix over them. Refrigerate for at least a day before serving. Will keep indefinitely in the fridge (and should be ok out of it too).

Sunday, August 14

Spiced damson jelly


Last weekend I was lucky enough to find a new internet friend who was offering spare fruit from his garden trees. He turned out to have a garden full of damson, greengage, apple and fruit trees, not to mention some rather luscious blackberries.

I had hoped to pick a bag of greengages that myself and the Curse could gorge on, but it turned out there weren't many gages left. Instead I picked a kilo of damsons and about a pound of blackberries, and brought them home to process.

The blackberries are now blackberry vinegar (using this recipe) and the damsons have been made into a slightly runny spiced damson jelly.

I used the basic jelly recipe in Pam Corbin's River Cottage Preserves book, and added a chunk of cinnamon stick, some cloves and some allspice to the damsons and water as I cooked them up.

After straining through muslin overnight, I boiled up the liquid with some sugar until it was starting to set, then put it into jars. It's still not very well set but that's fine as I will probably use it mainly to add to gravy and other sauces.

Tuesday, July 19

Pickled garlic

Despite being rather overworked of late, I've still found time to fit in some of my favourite pastimes, such as pickling for example.

Last weekend was time to lift the garlic from the mum-in-law's garden. It's been happily growing away there since I planted it last October, with very little intervention required. I wasn't really sure how well it would do - the soil is very dense and has a high clay content - but took my usual attitude of 'what's the worst that can happen?' and planted it anyway.

When I first started digging it up I was a bit disappointed, the bulbs seemed rather small. But not all of them were the same size - I had planted two different varieties - and some were very respectable. Seen here next to the beetroot, I'll just point out that this is a MONSTROUS beetroot, to help you better appreciate the scale!


My aim in growing garlic was a singular one - to replicate the wonderful jar of pickled garlic cloves I bought a couple of years back from the Isle of Wight Garlic Farm. These particular cloves were pickled in a classic vinegar, sugar and spices mix but with curry powder added. Crunchy and sweet they were incredibly moreish, eaten straight from the jar, perfect with a cold beer or even a cup of tea (yes I know perhaps I'm a bit weird...).

I'd already had a practice run with a couple of bulbs I dug up prematurely about a month ago. They were way too small but I peeled and pickled them, learning a few useful things on the way (eg you still need to take the skin off the green cloves, even though it's still fleshy and moist. Otherwise it will just come off when you pour the hot vinegar over it! Also that some cloves turn blue when pickled - absolutely nothing to worry about in terms of taste, although they do look a bit strange.)


Pickling garlic is very easy, it's the peeling that takes the time. And makes your fingers smell for several days afterwards!

I adapted a recipe out of the River Cottage Preserves book by Pam Corbin.


Approximately 20 bulbs of fresh garlic, cloves separated and peeled (apparently plunging them briefly in boiling water makes the peeling easier)
400ml cider or apple vinegar
200g of sugar
Fennel seeds
Black peppercorns
Bayleafs
Curry powder

Sterilise your jars then pack them with the peeled garlic cloves, throw a few of the spices and bayleafs in between the layers.

Heat the vinegar and sugar, stir in a spoonful or so of curry powder. I guess you could add a bit of chilli if you like.

When all the sugar is dissolved, pour into the jars so that the cloves are covered.

You can eat them within a few days, but I would suggest leaving them for a month or so to let the flavours really improve.

Sunday, May 29

Mango chutney

With boxes of six lovely ripe mangoes selling for £5 on Deptford High Street today, I decided to have a go at making my own mango chutney, something I've been meaning to do for ages. I was also prompted by the fact that the plum & chilli jam is running low, so I'm in need of something a bit spicey and sweet for that curry/sausage sandwich/pork pie type of moment.

I started with this recipe from the BBC Good Food website, and used it more or less intact except that I only had one apple rather than two. Cooking apples are elusive on Sundays - only the English greengrocer and the market stalls seem to sell them, the Asian greengrocers with the cheap mangoes don't have them.

Ingredients
4 or 5 large ripe mangoes about 1kg
2 tbsp sunflower oil
2 onions, halved and thinly sliced
thumb-sized piece fresh root ginger peeled and cut into thin shreds
10 green cardamom pods
1 cinnamon stick
½ tsp cumin seeds
½ tsp coriander seeds, lightly crushed
¼ tsp black onion seeds (Nigella or Kalonji)
½ tsp ground turmeric
2 Bramley apples, about 500g, peeled, cored and chopped
1 large red chilli, deseeded and finely sliced
375ml white wine vinegar
400g golden caster sugar
1 tsp salt


Fry onions gently in oil for a few mins, then add the ginger and cook for another 8-10 mins.

Add all the spices except the turmeric, fry for a few minutes. Add the turmeric, apple, 500ml water, cover and cook for 10 mins before adding the mango and cooking for a further 20 mins. 


Add vinegar, sugar, salt and cook uncovered for another half an hour or more, until the mixture thickens. Pour into sterilised jars, store for 8 weeks to let it mature.


On reflection, it might have been better if the mangoes had not been quite so ripe, they were very juicy and the mixture consequently was pretty wet. I'm not sure how well or if at all it will set, I perhaps should have added less water and/or vinegar. Tastes good at this stage though, can't wait to try it!

Sunday, March 27

Tarragon and garlic chive vinegar

Every year the tarragon plant on my balcony bursts forth with renewed vigour after surviving another winter - and every year I fail to make the most of its glorious flavour.


With the garlic chives also shooting out many new leaves I decided I should make the most of their spring freshness and whip up some herb vinegar. 'Whip up' is perhaps a little optimistic, since it takes about a month or so to mature, but it's certainly very simple.

You need 'some' chopped fresh herbs (recommended amount is four tablespoons) to go with each 500ml of wine or cider vinegar.


Mix the two and put in a bottle or jar. Leave in a cool, dark place for 4-6 weeks, then strain. Use in salad dressings, on roast veg etc etc, or put it in a bottle with a posh label and a bit of ribbon and give it as a gift!

See I told you it was simple!

Sunday, September 19

Sloe gin

The sloes have been so prodigious this year I have been itching to go out there and pick a potful in order to stoke up my first batch of sloe gin. It's recommended to wait until after the first frosts to pick your sloes, or prick each one individually in order to break the skin and allow the flavour out.

If, like me, you are not confident that you will be organised enough to pick on demand, or you are too impatient to wait, you can do it the cheat's way and put your sloes in the freezer overnight.


Once they have defrosted, combine about a pound of sloes with a pound of sugar and steep in 600ml of gin or thereabouts. Put them into a large jar and stir, then put the lid on. This is how they look at first:


Within hours the colour will start to seep out - a glorious beetrooty pink. Stir or shake every day for a week, then once a week for the next two or three months. Strain the gin through muslin or coffee filters before decanting into sterilised bottles. Keep it longer for a better flavour - 18 months if you can resist!


The sloes can then be steeped in cider to make 'slider'; made into chutney; pureed for ice-cream; baked into cakes etc etc.

Friday, August 6

Blackberry vinegar


It's very difficult to convey the beauty of this vinegar in amateur photos taken by a rather lazy photographer. Suffice it to say that it is the most scrumptious-looking potion I've ever seen! In the sun, the colour is dramatic and the aroma is mouth-watering. It's a great (and very easy) alternative use for blackberries if, like me, you don't eat a lot of jam.

Use it in salad dressings, on pancakes, with tonic water in the summer or with hot water in the winter as a drink.

The recipe comes from Pam Corbin's great River Cottage Handbook on preserves, which I've written about previously.

1. Pick your blackberries - best picked on a dry day to catch the full flavour.

2. Put the blackberries in a large bowl and squish them a bit, then cover them with cider vinegar. Cover with clingfilm and leave for five or six days, stirring occasionally. The vinegar will turn a beautiful deep claret colour.


3. Strain through muslin cloth or a jelly bag overnight. It's ok to squeeze the juice out of the bag to get as much as you can.

4. Measure the juice - for every 600ml of juice add 450g of sugar and put the whole lot in a pan. Bring to the boil, stirring till the sugar is dissolved, then boil gently for about 10 mins, remove any scum that rises to the top.

5. Cool, then pour into clean bottles. It will keep for a year at least.

Wednesday, July 28

Beetroot and orange chutney


For the beetroot I was torn between two recipes - one for beetroot & orange chutney that I found here, and Nigella's recipe for a straightforward beetroot chutney with heavy spice overtones. And you know how much I like spice!

But I had a couple of oranges handy and I figured that I can always try the other recipe with some of the other beetroot that are currently waiting to be harvested!


Beetroot & orange chutney

300ml vinegar (I used a mixture of white wine and malt vinegar)
200g granulated sugar
350g raw beetroot
350g cooking apples
half a dozen shallots
2 oranges
1 garlic clove
1tsp allspice
1tsp salt
1tsp mustard seeds
1tsp coriander seeds
1tsp black peppercorns

Peel and chop the apples, beetroot and shallots/onions into smallish pieces and place in the pan with the vinegar and crushed garlic clove.

Grind together the allspice, mustard seeds, coriander seeds and peppercorns and add to the pan with the salt.

Add the zest and juice of both oranges.

Bring to the boil and cook for about 40 minutes until the apple has gone to mush and the beetroot is tender - if you have used quite large chunks you might want to mash it into smaller pieces.

Add the sugar and cook for another 20 minutes or so before decanting into sterilised jars. You can sterilise the jars by putting them in a low oven (no more than gas mark 2) for five minutes.

I have to say that this chutney was tasty even at the bottling stage - usually it's rather vinegary and the spices haven't had time to permeate, which is why you are recommended to leave it 4-6 weeks before eating. It does bode well for early September!

Thursday, June 17

Elderflower cordial


Now is the time to be gathering elderflowers and whipping up a pint or two of the English classic Elderflower Cordial.

1. First source your elderflowers: often the bushes are found growing on waste ground or along the side of canals, rivers etc. I filched mine from a local park which has dozens of bushes. The recipe only calls for about 25 heads but I would hesitate to pick them in a park if there were only two or three bushes.

2. Wait for a dry, warm day to pick the flowers. This is when the distinctive scent will be at its finest. Pick flower heads which still have a few buds unopened. Avoid those with any brown areas on them.

3. Make as follows:

- 25 elderflower heads
- juice and rind of three lemons
- juice and rind of one orange
- 1kg sugar
- 1.5 litres water

Pick over the flower heads and remove any insects. Place in a large pan with the lemon and orange rind. Boil the water and pour it into the pan, then cover with a clean cloth and leave overnight.

The next day, use a sterilised* jelly bag/piece of muslin/old pair of tights to strain the liquid and return it to the pan with the orange and lemon juice and the sugar.

Bring to the boil, stirring until the sugar has dissolved and simmer for a couple of minutes.

Pour into sterilised* bottles.

The cordial will last for a few weeks in the fridge, but if you want to keep it for longer, you can divide it into small plastic bottles and freeze it, remembering to leave a bit of air at the top of the bottle. Alternatively you can add citric acid as a preservative.

To drink it, dilute with still or sparkling water/champagne etc to taste.

*I generally sterilise these using boiling water, but be careful if you are putting it in plastic bottles - they deform! In this case you might be best off getting some sterilising tablets.

Sunday, April 4

Plum and chilli jam


Not necessarily for use on your toast, although there's nothing to say you shouldn't!

The original recipe I found for this included arrowroot as the thickening ingredient. Not being able to source any arrowroot in my local shops, and having bought a bag of cheap plums off the market, I decided to make my own adaptation of the recipe by adding plums and doubling the amount of sugar. The resulting jam is not scarily sweet as you might imagine, the chillies give it a nice edge.

Plum & chilli jam

1lb/450g plums, halved and stoned
8 birds eye chillies
2 cloves garlic
2" root ginger
400g sugar
1 tsp salt
2 tbsp fish sauce (can be left out for veggies, although I think it gives the jam its edge)
220ml cider vinegar

(I also added about 50ml of water but I think it would be better without it as my jam is still slightly loose; the water from the plums should give you enough liquid along with the cider vinegar)


Chop the chillies, deseeded if you wish (I left seeds in four, and deseeded four). Peel and grate the ginger, and peel and crush the garlic cloves.

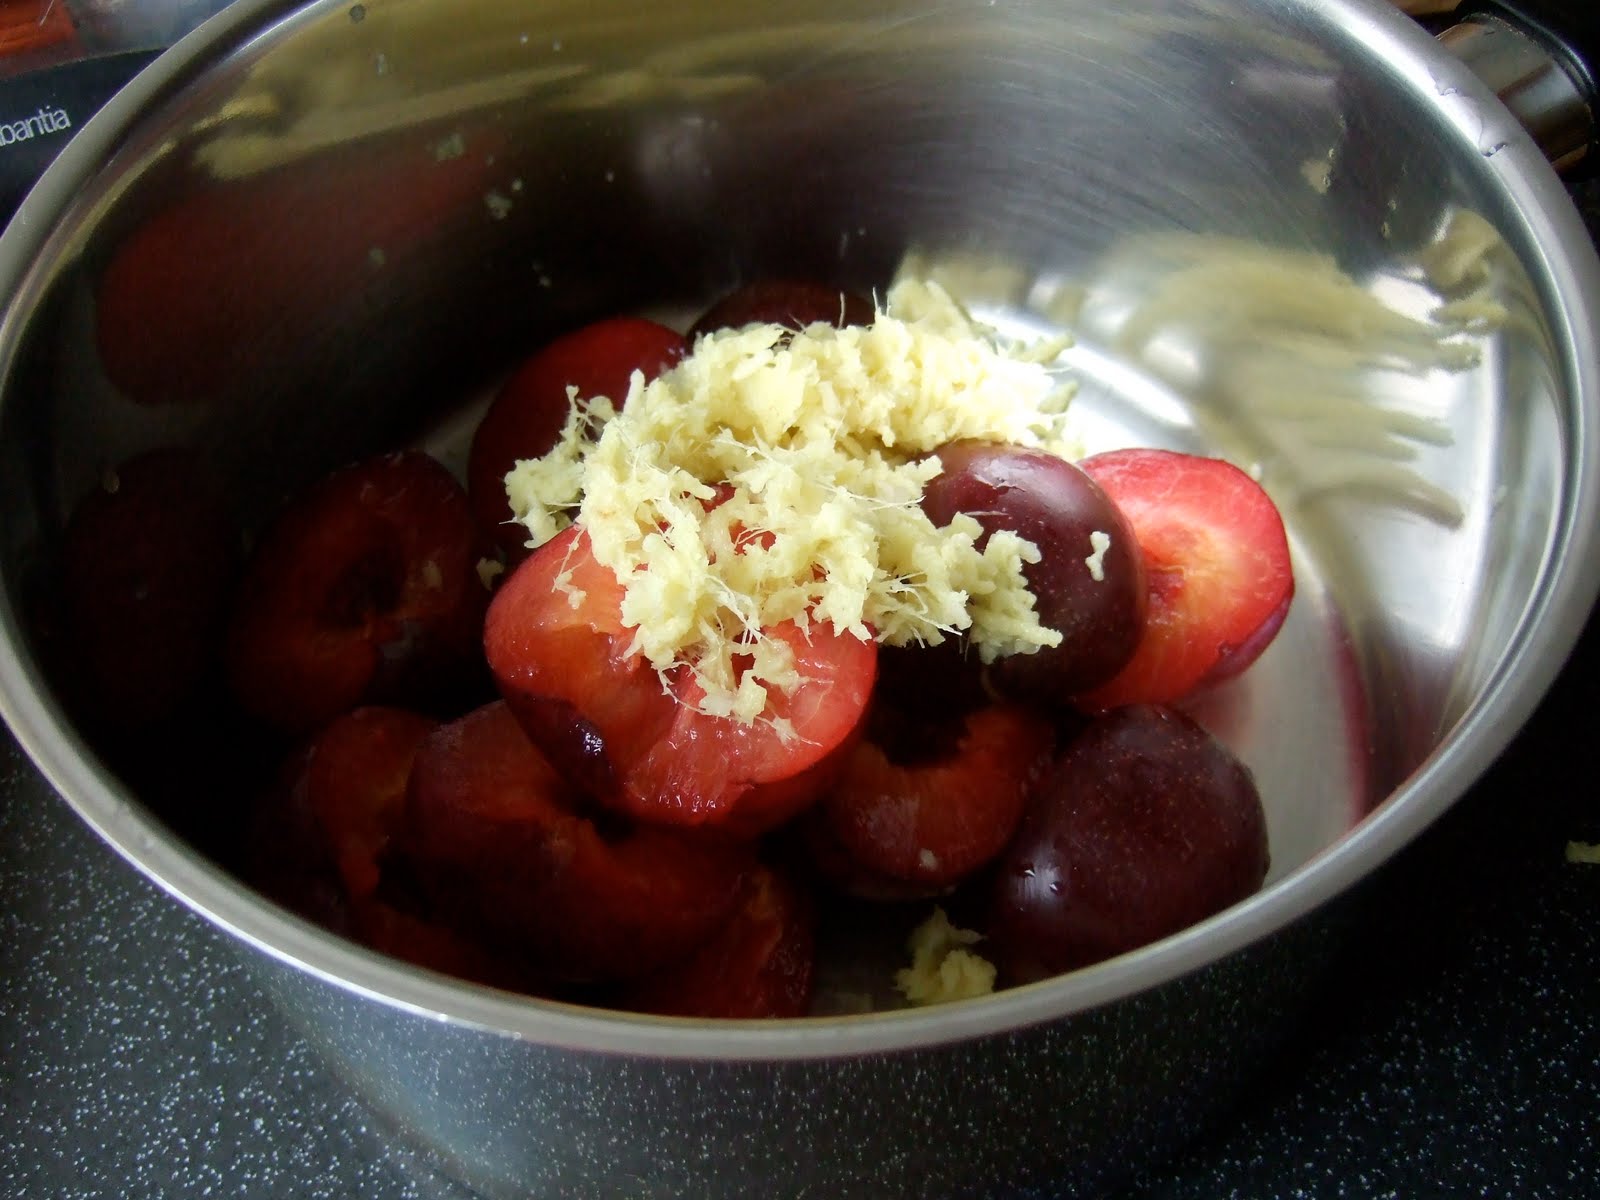
Put everything except the sugar into a saucepan and cook until the plums begin to fall apart. Fish out the plum skins as they come away from the flesh.

Add the sugar and bring to a rolling boil for as long as it takes to reach setting point. To work this out, put a saucer in the fridge to chill and then when the jam starts to thicken, take the saucer out of the fridge and drip a small amount of jam onto it. After a short while you will see it start to set (or if not, continue boiling the jam).

Decant into sterilised jars (5 mins in the oven at gas 2).

Friday, March 19

Hot apple chutney


Hot as in spicy, not temperature!

I bought a jar of this last year at the Tenterden Country Market (Women's Institute sale) during a cycling trip around the Kent coast. Its flavour has haunted me ever since - in a good way, I hasten to add! It wasn't like any chutney I'd had before - although it was mostly apple it did not really taste of apple, it brought a myriad of mysterious spices to the mouth, exploding with flavour and heat in a truly addictive way!

Luckily the label listed the ingredients, I've been saving it on the jar ever since. Although I couldn't find an exact recipe anywhere, I managed to find one that was close enough for me to use as a starting point.

It still needs a little work - the original recipe doesn't mention rinsing the salt off the apple slices before you put them in the chutney, but on reflection I think I should have done this. I rescued about half of them and rinsed them, but I still think the resulting chutney will be a bit salty. Also I misread the amount of turmeric, and put twice as much in as was needed, so my wooden spoons and plastic jug are rather yellow at the moment!

I added fenugreek to the recipe I found on bigoven.com, and left out the raisins. I also left the sugar until the very last, rather than putting it in with the apples - this helps them break down better.

2lb (900g) cooking apples, peeled, cored & sliced
2tbsp salt
half a cup (4floz) vegetable oil
1 head garlic, peeled
1" (25mm) ginger root, peeled
2tsp mustard seeds
15 peppercorns, crushed
2tsp cumin powder
1 tsp turmeric
2tsp fenugreek
3 dried chillies, crushed
half a cup (4floz) cider vinegar
4oz (100g) sugar

Sprinkle the salt over the apple slices and set aside.


Crush half the garlic and grate half the ginger, thinly slice the rest. Heat the oil (yes I know it's a lot of oil) in a large pan and fry the garlic and ginger gently for a few minutes.

Add the rest of the spices and fry gently for a further three or four minutes.


Rinse the apple slices and add to the pan along with the vinegar. Cover the pan and cook until the apple has broken down. Add the sugar and cook for a further five minutes.

Spoon into sterilised jars, fill as full as you can.(Sterilise them by rinsing with boiling water - both the jar and lid - or putting them in a low oven for about five minutes). Let it mature for 4-6 weeks before eating. Mmmmm!