
This is how it all started, in a wood in Herefordshire a couple of miles from the little town of Bromyard. I was here to make a chair, on a course led by famous greenwood chairmaker (and author of several books on the subject) Mike Abbott. Naturally, it began with a tree being felled, from the woods which were to be our home for a week.

One of the most crucial - and largely unpredictable, as we discovered - decisions that have to be made is which bit of the tree to use for which part of the chair. As well as having to saw the trunk into appropriate lengths which will yield pieces long enough for the back legs and which will make efficient use of all the available wood, it's important to identify the knots and natural bends and curves of the wood, and place them where they will be most decorative, or failing that, easily avoided. Some twisty trunks and branches are highly prized for specific uses, and we saw a great example of that with a piece of wood Mike chose as the perfect shape for the curved arms of the ladderback chair made by one of our group.
The first part of the process is to cleave the logs into smaller pieces, a technique requiring much more subtlety and precision than you would imagine, given that it involves axes, fros (thin cleaving blades) and large wooden mallets. I became very enamoured by the process, particularly as Mike managed to imbue it with an even deeper philosophical resonance, remarking occasionally on how the slow, thoughtful process of looking at both sides (of the wood) and stopping regularly to review your progress were good life lessons.

The first couple of days were a race to get all the bits of the chair made so that they could be steamed, bent and dried (in the case of the back legs and the chair back) or simply dried, in the case of the remaining pieces, in time to assemble the chair and weave the seat. Wood shrinks as it dries, and it shrinks by different proportions depending on the orientation of the grain, so most pieces which start off with a round cross-section will end up being slightly oval when they are dry. Since Mike's chairs all depend on mortise and tenon joints, no wedges or glue or nails, it's vitally important to get the dimensions of the dry joints correct, so that they will fit snugly.
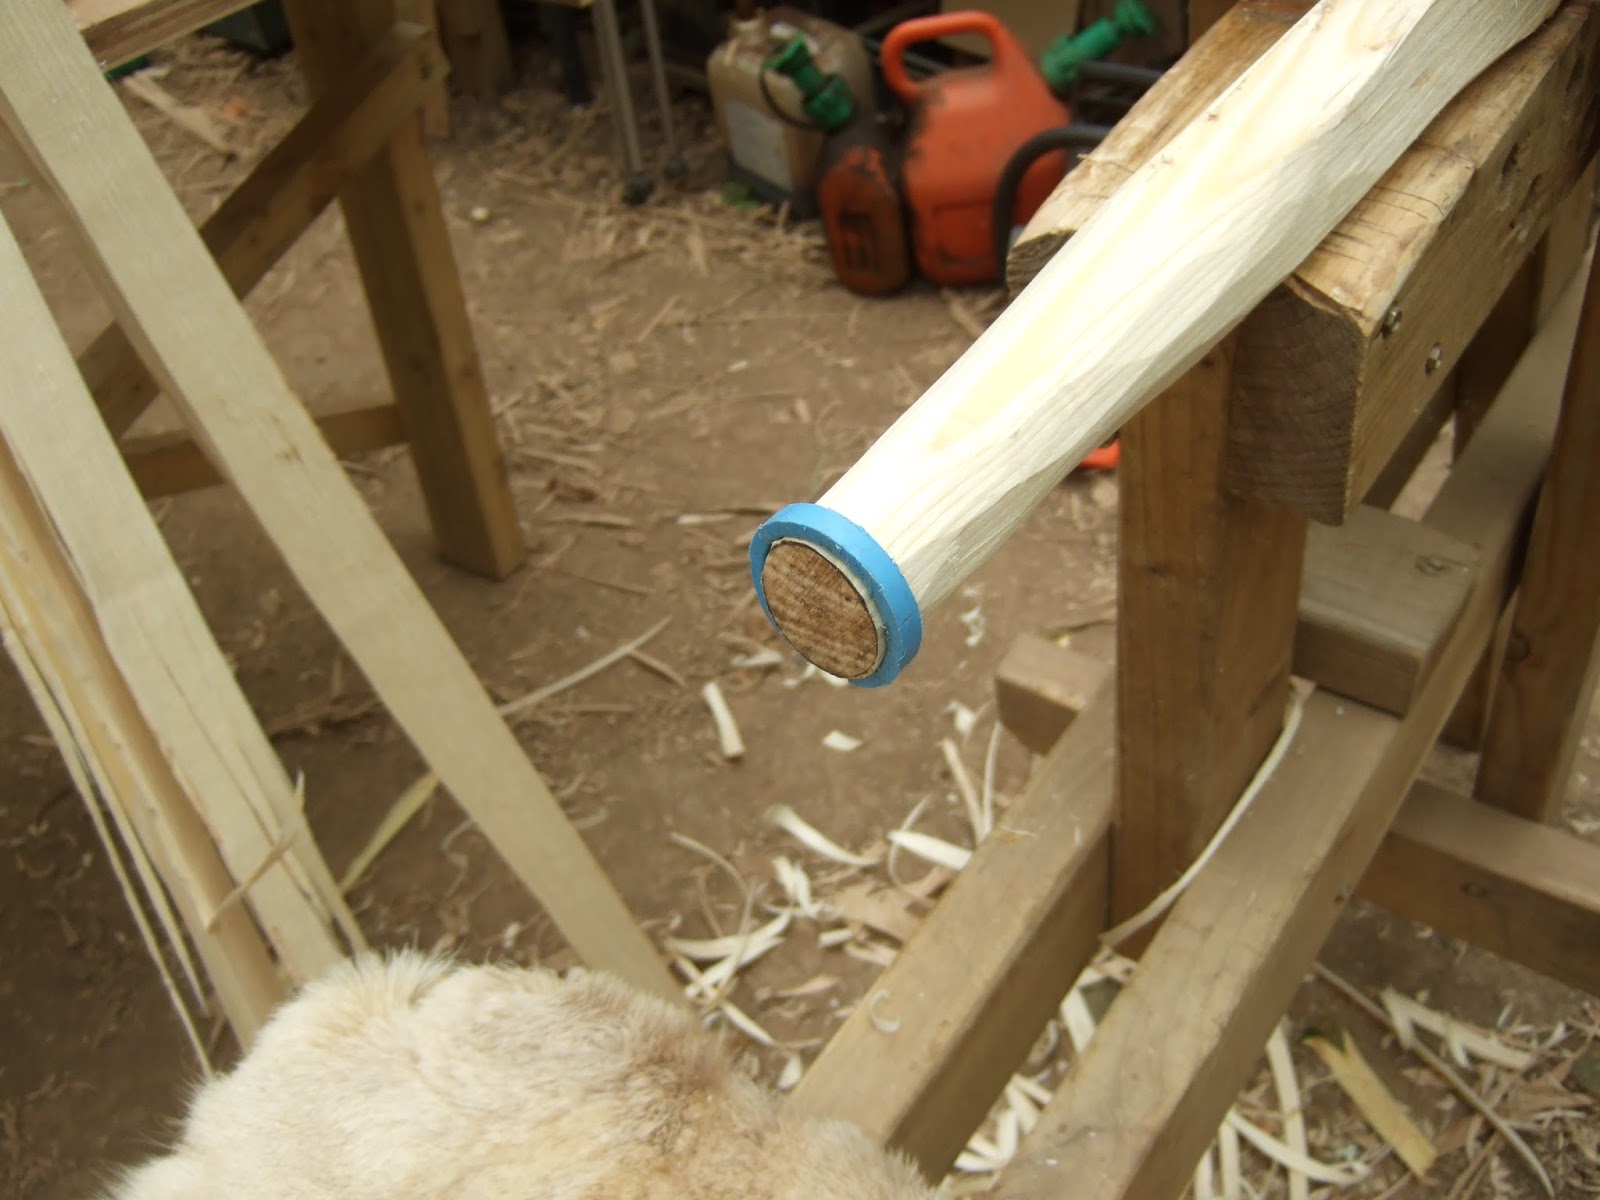

The majority of work took place on the faithful shave horse, using a drawknife to shape the legs and rungs, and a thin slice of plastic pipe (see above) to gauge the diameter. It took quite some time to slowly reduce the size of a chunk of wood to an even size so that the plastic ring could pass along its full length. Despite taking some time, it was quite a meditative process, and once I'd done the first one and improved my shaving technique, the remaining work was deeply satisfying. Learning to 'go with the grain' is one of Mike's mantras, and I began to understand how this approach could be implemented with success.

The legs and back pieces of the chair were steamed for about an hour in a large, coffin-like steamer placed on top of a huge drum of water heated over the open fire. They were bent and clamped into jigs, then left to dry in that shape for more than a day.

Smaller pieces like the rungs, seat rails and skinny little spindles for the back of the chair were shaped, had tenons cut on the ends using the Veritas tenon cutter, and were then dried in the 'warm box' for 24 hours or so, before being thoroughly examined by Mike with one of his favourite tools, the vernier calipers (something I haven't used since university!).

The mortises had to be drilled with appropriate precision - some vertical and others at angles which required calculation, use of the 'bunny ears' for alignment (I don't think I have a clear photo of the latter, so-called because of its shape) and working with a partner to sight you in from the other angle. There was lots of 'out a bit, back a bit, bit more, stop, ok'. Drilling made me quite nervous but after half a dozen mortises I got used to it.

The assembly of the chairs was great fun, albeit quite nerve-wracking; we used a specially set-up vise with enough space between the jaws to enable the chair sides to be placed in it. The handle wound the jaws together and we worked in pairs to wiggle the joints into place as it did so. It's a noisy procedure that initially strikes dread into the heart of the unitiated. Thankfully there were only a couple of chairs where one or two of the rungs proved insubstantial and which, after the initial sickening cracking noise, bringing a dreadful hush across the whole workshop, had to be replaced - luckily none were mine!


Most people made the simple spindle-back chair, but Wolf opted for a ladderback chair - clearly not enough of a challenge since he also decided he wanted to put arms on it too. He proved to be up to the challenge, although all credit to him, he did put in a lot more hours than the rest of us slackers, and was regularly working till darkness made it impossible.

The final day was the seat weaving - we all chose different patterns and materials, mine being Danish cord (essentially made of twisted paper) in a splayed weave. With expert help it was not too difficult to achieve, compared to the actual construction of the chair; funnily enough it seems to be the thing that most impresses people seeing the finished chair now!

I learned a lot of things this week, mostly that it's a bad idea to have shoulders on your seat rails (makes the seat weaving difficult at the ends), that cleaving wood is a philosophical, considered process, and that it's best to butter your bread very thickly on the outside when using toasty makers in an open fire.

Here's the eight course participants with our finished chairs (From L: Dan, Leon, Alice, me, Wolf, Lewis, Jack and Ian), and our assistants Sharyn and Steve, one at each end of the row.
You can see some of Mike's videos on Youtube


